2016-08-06 18:37:17老貓
[Challenge] 快樂魔法(步驟分享)
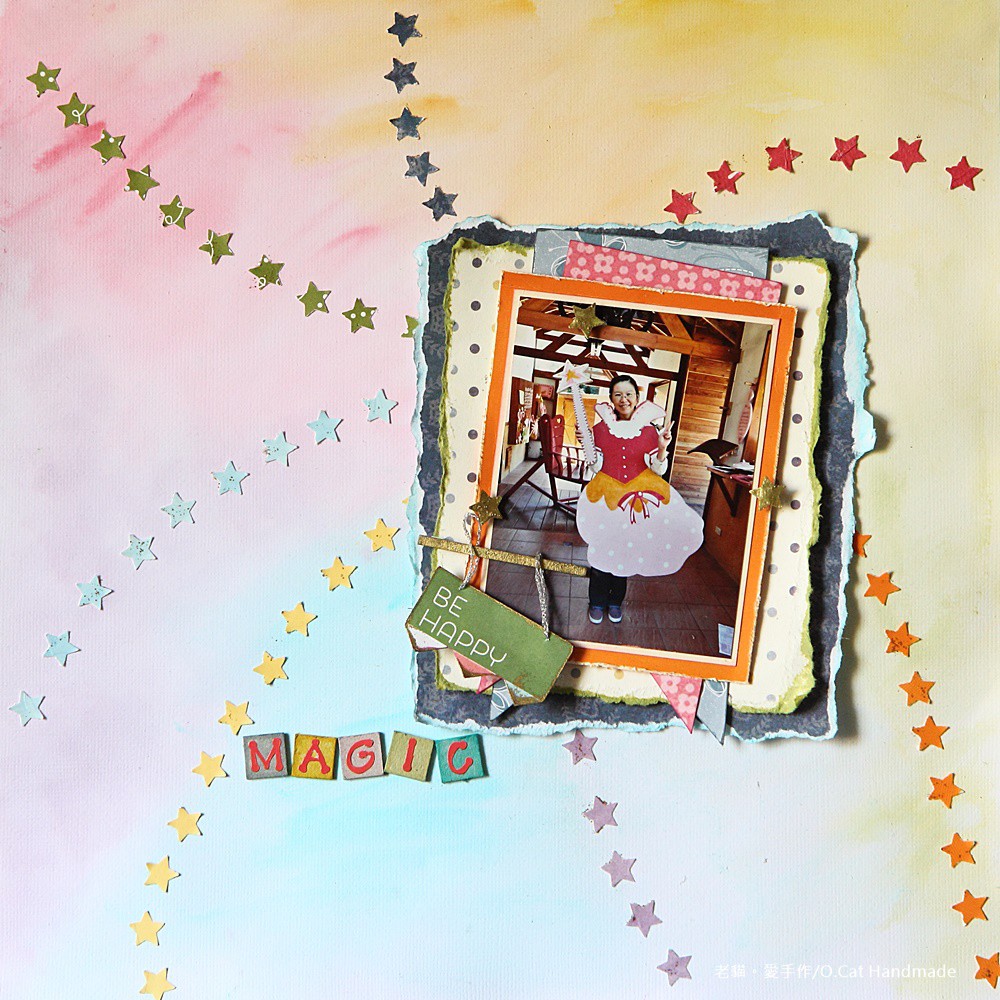
♥ 相片美編。12" x 12" Layout-MAGIC ♥
(Click on the picture then press the zoom button to the right to see the picture in original size.)
這張照片是2014年在台中新社的安妮公主花園拍的。園區有一間小小木造公主魔法故事屋,裡面有幾件木製的平面公主裝,當下沒有遊客在小屋,於是老貓拋開平時拘謹的包袱,和朋友玩起『變裝』遊戲,那種感覺真是無拘無束,開心極了!今日看到這些照片,臉上總會漾起一抹會心微笑,這也是老貓挑這張照片做相編的原因,拋開拘謹的自我,就會很快樂,也是"Meghan Trainor - Better when I'm dancin "歌詞給老貓的感受。
The photo was taken at an amusement park where there was a "Princess Magic Story House" with some wooden princess clothes inside. I dressed one and took the cute photo.
LM 304 - ROYGBIV - Include all 7 colors of the rainbow or an actual rainbow on your layouts.
♥ 近拍。 Close ups ♥


♥ 步驟。 Tutorial ♥
1. 用鉛筆在背景紙定位。
Mark the positions of the photo with a pencil.

2. 用筆刷沾水將紙刷溼,然後用Distress Ink,選彩虹的七個顏色,用水稀釋顏色後,將背景紙大約分為七個區塊,以照片為中心點放射狀的刷上七個顏色。待乾。

4. 把照片貼在素色背景紙上,再用復古印台暈邊。


10. 加上文字完成囉。

感謝你耐心地看完本篇,歡迎和老貓分享你的想法喔!
Thanks so much for stopping by and for your wonderful comments.
♥ 歡迎訂閱老貓的新聞台或加入臉書粉絲頁、社團 ♥
➡ 我的臉書粉絲頁
https://www.facebook.com/O.CatHandmade/
➡ 我的臉書社團
https://www.facebook.com/groups/OldCatHandmake/
(Click on the picture then press the zoom button to the right
這張照片是2014年在台中新社的安妮公主花園拍的。園區有一間小小木造公主魔法故事屋,裡面有幾件木製的平面公主裝,當下沒有遊客在小屋,於是老貓拋開平時拘謹的包袱,和朋友玩起『變裝』遊戲,那種感覺真是無拘無束,開心極了!今日看到這些照片,臉上總會漾起一抹會心微笑,這也是老貓挑這張照片做相編的原因,拋開拘謹的自我,就會很快樂,也是"Meghan Trainor - Better when I'm dancin "歌詞給老貓的感受。
The photo was taken at an amusement park where there was a "Princess Magic Story House" with some wooden princess clothes inside. I dressed one and took the cute photo.
I was inspired by the lyrics of the song "Meghan Trainor - Better when I'm dancin ". You become a happier and confident person if you are willing to step outside your comfort zone and overcome the shyness. And it is the reason why I used this photo.
When you finally let go
When you finally let go
And you slay that solo
Cause you listen to the music
Sing, oh, ey, oh
Cause you're confident, hey
And you let your hips sway
If you knew that you could do it
Sing, oh, ey, oh
The background of the layout is painted in colors of the rainbow, and pasted with stars which are also in rainbow colors.
作品有參加以下幾個挑戰。
This 12"x 12" layout is based on the following challenges.
作品有參加以下幾個挑戰。
This 12"x 12" layout is based on the following challenges.
➡ Scrap It With a Song -Auguest challenges
I picked the song "Meghan Trainor - Better when I'm dancin ".LM 304 - ROYGBIV - Include all 7 colors of the rainbow or an actual rainbow on your layouts.
♥ 近拍。 Close ups ♥
♥ 步驟。 Tutorial ♥
1. 用鉛筆在背景紙定位。
Mark the positions of the photo with a pencil.
2. 用筆刷沾水將紙刷溼,然後用Distress Ink,選彩虹的七個顏色,用水稀釋顏色後,將背景紙大約分為七個區塊,以照片為中心點放射狀的刷上七個顏色。待乾。
Moisten the background with a brush, then paint with the colors of the rainbow, and let it dry.

➡ 背景製作影片 (The process of making the background.)
https://youtu.be/6GWwL4wNzUk
3. 用美編紙剪下幾個星星,星星也是要有彩虹的七個顏色喔。在背景紙以照片為中心排版一下,確定星星的數量夠用。
Cut out paper stars in rainbow colors and align them radially from center.
➡ 背景製作影片 (The process of making the background.)
https://youtu.be/6GWwL4wNzUk
3. 用美編紙剪下幾個星星,星星也是要有彩虹的七個顏色喔。在背景紙以照片為中心排版一下,確定星星的數量夠用。
Cut out paper stars in rainbow colors and align them radially from center.
4. 把照片貼在素色背景紙上,再用復古印台暈邊。
Stick the photo to a solid color paper then paint the edges.
5. 再疊一層背景紙,用美工刀在紙張邊緣刮一刮,讓邊邊有復古效果
Attach another solid color paper from back, and use a box cutter to scrape the edges to make it look retro.
6. 用撕邊的方法,再準備兩層的襯紙,下一層要比上一層寬一些。再用復古印台暈邊。
Attach two more layers of paper at back, tear them to adequate sizes and paint the edges.


7. 準備好所有的素材後,開始將照片、襯紙、星星...等等有層次的黏貼起來。
Get all materials ready, then start to combine them layer by layer.
8. 將字卡用金色凸粉裝飾,再做成小吊牌。
Decorate the text card with gold embossing powder and make a tag.

9. 在每個星星塗上金色的亮膠。
Apply "distress stickles" to all stars.
10. 加上文字完成囉。
Decorate with the title "MAGIC". Layout completed.
感謝你耐心地看完本篇,歡迎和老貓分享你的想法喔!
Thanks so much for stopping by and for your wonderful comments.
♥ 歡迎訂閱老貓的新聞台或加入臉書粉絲頁、社團 ♥
➡ 我的臉書粉絲頁
https://www.facebook.com/O.CatHandmade/
➡ 我的臉書社團
https://www.facebook.com/groups/OldCatHandmake/
上一篇:彩虹
繽紛七彩背景讓整張相編感覺好活潑(當然照片也好可愛),星星貼紙的排列也好有創意,希望這張相編有好消息喔!謝謝老貓參加SIWAS這個月的挑戰~
版主回應
謝謝Maya的讚美和鼓勵。^^。♡
2016-08-19 08:47:59
such a pretty LO ! Thank for joining us at SIWAS
版主回應
Thank you so much, Caroline. :-)
2016-08-13 07:30:45
Awesome layout! Love the tutorial! Thanks for joining us at Scrap it with a Song!